Wednesday, January 25, 2012

Stuffed Steak Sandwich Thing

So, I can't lie. I've been remiss in updating. We're all going to pretend that I was off leading a charge of mutant crabs against Fox News or something equally interesting enough to turn into a movie then have it grittily rebooted in about ten years. To make up for my massive failure in updating this blog, meet this sandwich thing! It's probably the most awesome yet practical meal I've made in a long time since I've been subsisting off of tacos and shame lately.

Super Stuffed Sandwich Thing
Ingredients
One round loaf of bread like substance: I used a cheddar jalapeno loaf.
One pound of bacon: Feel free to use more. 
One chopped onion
Shallots: as many as you feel like chopping up. I used four.
Mushrooms: as many as you feel like chopping up. I used 2 containers.
Cheese: This amount is subjective. If you like a lot of cheese, use a lot of cheese. If not, sprinkle lightly.
Ribeye: I had to compare the meat to the side of the loaf I was fitting it into. 20 oz for me. May be different for you.
Other Stuff: At the last minute, spinach was tossed in. Really, you can add anything that can be sauteed down to a smaller size. 
Step One: Love your meat.
 Seriously. Season it with any and everything that you would put on a steak. Rub it in. Make sure you have the exact amount of seasoning you want because opening this sandwich to fix it later will make a mess. Cook the ribeyes in your preferred method and sit aside for later use. We broiled ours.
Step Two: Bacon!
 Start cooking it. Do it!
 Step Three: Cut up everything you wish to sautee. We used Shallots, Onions and Mushrooms.
 Don't do it on the board that you're seasoning your meat. That's just nasty.


 Step Four: Remove bacon from pan and use bacon drippings to sautee everything
 If somehow bacon grease doesn't turn you on, then by all means pour most of it off or use something else. However, the delicious delicious bacon drippings add a lot of flavor.
Step Five: Bacon!
 We decided crumbled bacon would work out better than strips so we crumbled it into the veggie like stuff.
Step Six: Color!
 Tasted great but looked boring so we added some greenery. Next time we'll add green and red and call it Christmas in July. The Spinach turned out to be a great addition.
 Step Seven: Hollow out the bread.
 I forgot to get a picture of this step. Cut off the top layer and hollow the bread out much in the same way you'd make a bread bowl.  In the above picture, we had already put a layer of cheese, a steak, and another layer of cheese inside of the bowl.
 You will have to smash everything down repeatedly.
 It's kind of sexy actually
 So Tasty
 Don't be afraid to get rough with it. Just don't break the sides of the bread.
Put the top you cut off of the bread back on top. We melted cheese to it to ensure it stayed in place.
 Step Eight: Wrap it in something
 You don't want it leaking all over do you? I mean I do but that's because I'm a sick individual.
Step Nine: Put something heavy on it.
 We liked this method of flattening it because we could add liquid to make it heavier. Also, it reminded us to start a new batch of Mead.
 Should end up looking pretty flat after a while. We waited thirty minutes. Your mileage my vary.

 Step I'm too lazy to scroll up to find out what step I'm on: Bake at about 350.
 Everything is already done on the inside but we wanted it hot and gooey. We left it in for about fifteen minutes.

Observations
It was full of awesome. I would add more cheese because the compression forced the cheese to the sides. It soaked into the bread and was still delicious but I would prefer to have just as much cheese in the middle as I do the sides. 
Now, if you folks will excuse me, I have to delete facebook and hit the gym after eating that.

Monday, August 1, 2011

Sorry Folks!

This week's blog is being postponed to deal with a bit of Crazy. I normally don't tolerate Crazy but it had found me and was leaving nasty comments because of a personal problem that Crazy has with someone who is only tangentially related to me. I actually can't be too mad as this particular individual is working with a lot of misinformation but that shouldn't spill over to a blog about food. I  have changed a few settings so people reading this blog do not have to be bothered with nonsense that does not relate to the topic at hand. I apologize for the delay in the next item as it was something someone commissioned. An update will be forthcoming.

Thursday, July 21, 2011

Nero has some Boocake on his face.

Black Betty Q Correspondent Nero had a birthday two days after mine recently. We had all made the pilgrimage to the Mecca for all Fatness (Texas De Brazil) to celebrate life in the best way we new how, which was by consuming vast amounts of dead things. Our dear friend, who will only  be identified as Nancy for some reason or other got on the topic of Bukkake. If you do not know what it is, Feel free to google it *Disclaimer* Black Betty Q does not take responsibility for what you may see or hear while googling things under their recommendation. Please make sure all links you click on are in compliance with your local laws and Geneva Convention.*Disclaimer Over*For those of you who A) don't speak Japanese or B) Have never spent any time of 4chan, The word is pronounced Boo-cock-ee (no comments from the peanut gallery please). Nancy, however, was thrilled to regale us with tales of his explicit interest in Boo-Cake. Indeed, one would wonder how Nancy had time for anything else with all of the Boo-Cake in his life. This conversation didn't end until 3 am in a White Castles where more Black Betty Q Correspondents were designing machines with at least 4 inches of throw for the...ahem...specialty crowd. Seriously, check the bathroom wall in the White Castle at Hoffman Estates. You'll find Schematics for a device that will end up being the beginnings of Skynet if Japan gets their hands on it Now what does this have to do with Nero and Cake? I honestly can't remember. However, in honor of his birthday, we present you with Boo-cake.
BooCake

Things Needed:
Box of Cake mix of your choice. We used Red Velvet.
1 box of pudding of your choice (but it would make sense if it were a pudding that semi-matched your cake mix.). We used Devil's Food.
4 eggs
1 1/2 cups of water
2/3 cup of oil
Creamy Center: 8 ounces of cream cheese, 1/2 cup of sugar, 2 eggs
1 can of Cream Cheese Frosting
Step 1: Empty the cake mix and the pudding mix in the bowl. Do not follow the instructions on the back of the cake mix. Adding the pudding mix alters everything and it will come out much thicker than necessary.
Step 2: Add 4 eggs.
Step 3: Add the oil and water.
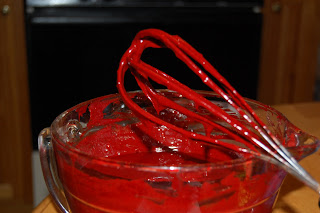
Step 5: Find some sucker to whisk that for you if you don't have a mixer handy. If your cake doesn't look like tasty murder, you're doing it wrong.
Step 6. Oil your desired pan. This is important. You do not have to use a Bundt pan like we did but make sure whatever you are using is deep enough for the creamy filling layer.
Step 7: Realize there is a cat licking the tasty butter flavored pam and olive oil out of the bundt pan. Wash pan and start over.
Step 8: Put in the first layer of  cake batter. We used roughly 1/3 of the total mix here.

Step 9: Forget to take pictures of the creamy filling step and only realize it when posting a blog. For this step, mix together the cream cheese, eggs and sugar. We tossed ours in the blender. It should come out white, creamy, frothy, and delicious. Nancy is in heaven. Add delightful mixture on top of the first layer. It's ok if a little mixing happens
 Step 10: Start adding last layer of cake batter when someone suddenly realizes that this cake would be more awesome with chocolate chips in the cheesecake layer.


Step 11: Grudgingly add chocolate chips and push them into the batter. It's probably easier to just put them in the cheesecake batter while mixing it up but this method leaves you with a case of tasty finger.
Step 12: Cover top layer as much as you can with cake batter (again)
Step 13: Bake this bad boy at 350. It took one and a half episodes of Red Dwarf before a knife came out clean ( or in non geek terms, roughly 45 minutes) Cooking time will vary depending on oven so keep an eye on it. Nothing is worse than overcooked BooCake.
Step 14: Remove from Bundt  pan.
Step 15: We coated ours with candy bar glaze (yes we have milky ways melted down just handy and ready to go for glazing emergencies. We keep it in a frosting can.) This step is not necessary. We just like sugar.  If you don't feel like melting down milky ways, any melted frosting or sugar substance will do.
Step Most important: Heat Cream Cheese Frosting from the can just enough to get it melty. Put cake on something that can be thrown away and fling frosting and great distances. Anyone who misses must drink a woodchuck. If you aren't that adventurous, I suppose just drizzling will do. However, I should point out that in True Bukkake Spirit, it's only authentic if the frosting has flown through the air at great velocities.

The end product should look similar to this. Next time, we will probably double the cheesecake layer for double our pleasure. *NOTE* This cake is good first day but this cake is AMAZING after being refrigerated overnight. People were shoving Boocake in their mouths left and right the next day. *Disclaimer* We here at Black Betty Q are not responsible for anyone choking on Boocake.

If you folks will excuse me, I'm off to prepare The Son of Boo-Cake (Fudge Tunnel)

Wednesday, July 13, 2011

Woodchuckpenadas With Woodchuck Apple Drizzle

We here at Black Betty Q have made Woodchuck Hard Cider our official drink. We regularly sacrifice our livers to the great WoodChuck gods in the sky. This is why we were excited when Woodchuck put out a limited edition release called "Spring". Only problem was, it tasted like ass, and not the good ass either. We're talking about the kind of ass that makes you want to cut your tongue out. The concept behind this Chuck was that it added a *hint* of Maple syrup. Hint was the understatement of the year as it was more like having your tongue raped by a maple tree (Oh God, the Splinters!). So, this particular Chuck sat in the fridge for a while. We here at Black Betty Q hate wasting alcohol so we devised a way for it to be used and consumed in a way that didn't make us want to flash fry a forest.
*Disclaimer- our first attempt is not exciting to look at but I assure you that based on the level of drunkenness and fried pie consumption going on that these are delicious and dangerous in the hands of people who's sobriety is questionable. Injuries include: Flaming Hot Pie Mouth Burns and Concussion (pretty sure someone just fell off of my back porch which isn't all that related to pie but we here at Black Betty Q aren't going to be responsible for other drunken idiots on the Internet).

Woodchuckpenadas (Like apple empanadas except chuckier)
 Items Needed:
1. Apples: We used both real apples and then some apple pie in a can once we realized we didn't have enough real apples.
2. Butter: 1 stick
3. Woodchuck: Whatever amount you're willing to part with. At least one bottle was used in the making of this recipe but it's possibly as many as three. I can't quite recall.  I suppose any hard cider would do but really now, why mess up this glorious recipe with any old hard cider?
4. Pie crusts: We cheated. I didn't feel like making dough from scratch so we got pie crusts instead.
5. Brown Sugar: Lots (we don't actually measure much around here)


 Step 1: Toss the stick of butter in a pan and lots of brown sugar.

 Step 2: Once that gets going, Add Woodchuck. We added nearly a whole bottle at this point.
 Step 3: Whisk Whisk Whisk. Also, take a drink of Woodchuck.

 Take a drink here too.
 Keep up a good pace to ensure everything dissolves properly. If you have not drank an entire bottle of woodchuck at this point, you have to finish the bottle you're on AND start a new bottle. This relates to the cooking experience, I assure you. Once you are sure everything is dissolved, remove half of whatever mixture you have and set aside to make dipping sauce later. The other half is used in the next step.

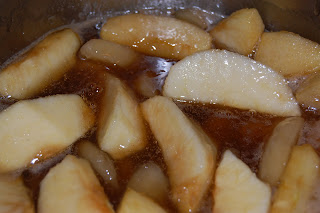
 Step 4: Add Apples. Are you still drinking?
 The apples will need to cook in this mixture for a while to soften up. Add more woodchuck if the mixture thickens too much. Drink More woodchuck to pass the time. There's a lot of woodchuck in this step. We were on carton number 2 if I recall. I would estimate half another bottle went in the mixture above over the course of a half hour. The other 5.5 bottles went in us.
 Step Weeeeeeeeeee: Once you are assured that the apples are soft, remove from heat. Set aside.
 Step 7: This part was tricky for me because my motor skills were suffering at this point. Take some of the dough and roll it out just big enough for a few apples to fit in once it's folded over. If your dough is sticky, keep a bowl of flour handy dust the dough in.
 Step 8: Add Apples. I stupidly did this when the apples where still amazingly hot. Don't do this. Let the mixture cool. It will be easier to handle and it won't melt out of the sides.
 Step 9: Roll the dough over and crimp the edges. Yet again, I inexplicably was suffering from fine motor skills fail so these are not as pretty as they could have been. To compensate for this, we drank more woodchuck.
 Yet another Ugly Pie. At this point, we were highly worried about whether they would hold up in the fryer.
 Step...something: Toss these bad boys in a fryer. Do not take out too early. They will brown on the outside well before they are done on the inside. It appeared to take roughly 3 minutes total at a heat of 375 f. That being said, time was getting kind of relative to woodchuck at that point.

 Steppity Steppity: Roll in Sugar while it's still hot. We cheated and tossed a bunch of sugar in a bag and then threw the pies in and shook the whole works up.
 Last step: Drizzle with sauce.  We also have a sauce that was made with the sauce from above mixed with cream cheese but it appears to be missing and possibly consumed so no picture of that sadly.
 The Sugar/Alcohol/Carb Count on these is pretty darned detrimental to the health of anything human so eat at your own risk. If you folks will excuse me, I'm off to learn how to play something called quarters.